
Home About us Industrial products Contact us Distributors
 | Tachometer (LASER TYPE)model:dt-2234c
|
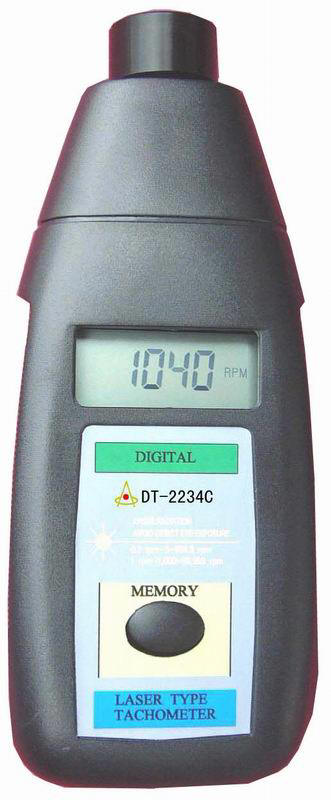
| opeartion manual for tachometer dt2234c | 1. FEATURES * Measuring RPM is safe & accurate without attachment to object. * Wide measuring range & high resolution. * Digital display gives exact RPM with no guessing or errors. * Used the exclusive MICRO-COMPUTER LSIcircuit and crystal time base to offer the high accuracy measurement & fast measuring time. * The last Value / max. Value / min. Value will be automatically stored in memory and can be displayed by turn. * The use of durable, long-lasting components, including a strong, light weight ABS-plastic housing assures maintenance free performance for many years. The housing has been carefully shaped to fit comfortably in either hand. 2. SPECIFICATIONS Display: 5 digits, 10 mm (0.4 ) LCD (Liquid Crystal Display). Test Range: 2.5 to 99,999 RPM (r/min) Resolution: 0.1 RPM (2.5 to 999.9 RPM) 1 RPM (over 1,000 RPM ) Accuracy: (0.05%+1 rpm) Sampling Time: 1 sec. (over 60 RPM) Test Range Select: Automatic Memory: Last Value, Max. Value, Min. Value. Detecting Distance: 50 to 250mm / 2 to 10 inch (typical max.350 mm /14 inch. Depending upon ambient light). Time Base: Quartz crystal Circuit: Exclusive one-chip of microcomputer LSI circuit. Power Supply: 4x1.5VAA (UM-3) battery. D.C Consumption: Approx. 80mA(operation). Operation Temp. 0 to 50 (32 to 122 ). Size: 190x72x37mm (7.5x2.8x1.5 inch) Weight: about 300g/0.65 1b (including batteries) Accessories: Carrying case.................................. l pc. Reflective tape marks (350mm).........2pc. Operation manual.............................1pc. 3-5 Measure button 3-6 Memory button 3-7 Battery Compartment/Cover 4. MEASURING PROCEDURE Apply a reflective mark to the object being measured. Depress the MEASURE BUTTON (Fig. 1,3-5) and align the visible light beam (Fig. 1,3-2) with the applied target, verify that the MONITOR INDICATOR (Fig.1,3-3) lights when the target aligns with the beam (about 1 to 2 seconds.) 5.MEASURING CONSIDERATIONS 5-1 REFLECTIVE MARK Cut and peel adhesive tape provided into approx. 12mm (0.5 ) squ ares and app ly on e squ are to each rotation shaft. a. The non-reflective area must always be greater than the reflective area. b. If the shaft is normally reflective, it must be covered with black tape or black paint before attaching reflective tape. c. Shaft surface must be clean and smooth before applying reflective tape. 5-2 VERY LOW RPM MEASUREMENT As it is easy to get high resolution and fast sampling time, if measuring the very low RPM values, suggest the user to attach more REFLECTIVE MARKS averagely. Then divided the reading shown by the number of REFLECTIVE MARKS to get the real RPM. 5-3 BATTERY REMOVEMENT If the instrument is not to be used for any extended period, remove batteries. 6. MEMORY 6-1 A readout (the last Value, max. Value, min. Value ) obtained immediately before turning off the MEASURE BUTTON is automatically memorized. For example, please ref. following fig.2. 6-2 That Memorized value can be displayed on the indicator by turn once depressing the memory button. The Symbol UP represents the Max. Value and dn the Min. Value; LA ,The last Value. 7. BATTERY REPLACEMENT (1)When it is necessary to replace the battery, i.e. battery voltage less than approx. 5v, symbol - + will appear on the Display. (2)Slide the battery cover (Fig.1,3-7) away from the instrument and remove the batteries. (3)Install the batteries (4x1.5V AA/UM3) correctly into the case. VARNING: DIRECT EYE EXPOSURE TO LASER LIGHT SOURCE IS HARMFUL AND SHOULD BE PROHIBITERD IN ANY CASE.
|